Friday, December 31, 2010

Toothbrush Rag Rugs - Denise

I'm making progress. I decided to make my own needle. I read a post from BellWether that she had used a Popsicle stick. So I thought, "Why Not!"

I scored one from my daughter's DayCare center (Thanks TLC Center) and filed and sanded it to shape. I used my Yankee driller to make the hole. I used paraffin wax (that's what I had on hand) to seal it so it wouldn't catch on the flannel sheet strips. I do have a beeswax candle somewhere in the house. It's somewhere really safe right now.


That done, I find that it really is easier to use a needle that a bodkin. The metal hoop on the bodkin kept catching in the loops. Now, I'm going much faster.


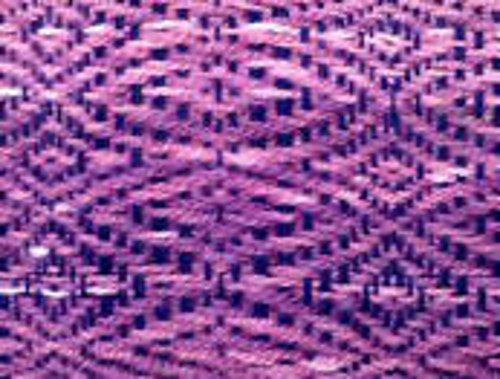
This is actually fun! Looking at the photo, I need to vary the placement of my color changes to hide them a bit better.

Oh, to make the needle, I found the center line first. I measured down from the tip about 1/2". I use my file to roughly shape the lines and round things out. I sanded out the roughness with 200 grit sandpaper. I took my Yankee driller and drilled out the back end 3/8" up. The hole is about 3'8" - 1'2" long. I sanded it smooth with folded paper.

Wednesday, December 29, 2010

Toothbrush Rag Rugs - Denise

I'm on a learning curve here. I've learned that I don't need a toothbrush to work my Toothbrush rug. I'm using a bodkin that I bought at JoAnne Fabric for $1.74. I'll try a Popsicle stick later.

I've learned by trial and error how to do the stitches. I have a few videos to list to help out.
Here's one for the basic beginning steps. It's a YouTube video that I can't embed here.
The next is this for the stitches. This guy is good is examples, but does ramble a bit.

After you get going, the stitches are a bit complicated to visualize. I was stumped and made one heck of an ugly rug. Then I got it after watching some videos. If I pick up the proper stitches in the proper order, then I'll get the braided effect.

Increasing is a puzzler. Some say to increase here and there. Others suggest at certain points. The best way I've found it to let the rug do the talking. It was mentioned to look for the 90 degree angle. What in the world were they talking about? Then as I turned the corner of my rug, I saw it. See the photo below.

MATH AND LOGIC
So far, I’ve found information about buying fabric. You ready? BellaOnline describes the process and the ratios.
1/2# will make one foot squared
1# = 4 yards of cloth (I’m guessing of 36”).
12 yards of cloth will make a 2’x3’ rug
2” strip = 7/8” stitch
1” strip = 1/2” stitch

Math: 2’x3’=6 ft squared. 6 x 1/2 = 3#. 3x4=12 yards

Other math and logic

  • Increase on the 1st curve twice (if it works that way). The next 3x. Do so several times. You may need to increase 4, 5, or 6x. Look to where there is a gap. Fill the gap.

  • For an oval rug, make the braid or chain stitch beginning 1/3 as long intended total. 12” for a 36”x24” rug.

  • If your rug cups, add in stitches at strategic places.

Tuesday, December 28, 2010

Homemade Raddle - Denise

Here we go. After my adventure (fiasco) using sectional warp with my camp towels, I discovered that irregular stripes were probably easier and wiser to do with a warping board and then warped using a raddle.

I didn't have one. I looked up on some sites and found that ones for my loom would cost around $50 + s/h. I searched some sites and found that I could indeed make one for myself.

I looked up and found that 1x2 pine lumber is about $5 for 86". Use a soft wood so it doesn't split when nailing. Otherwise you will need to drill a small starter hole.That would give me 2 raddles of 43" for my 36" loom. That puts 2" beyond the desired loom width to clamp. The finishing nails I need are 1-1/2" bright finishing nails. I could buy 1000 or a smaller assorted box for $2.99.

I don't like sanding so I painted mine with leftover satin paint, 2-3 coats. I measured roughly 1/2 way down the good side and drew a light line. I then made 1" marks for where the nails would go starting with the center and moving outward from both sides.


I then started at one end and carefully hammered the nails in. On the second one I left the very end one off. I needed something to clamp, logically. I'll go back and pull the end nails later.


I only hit my thumb once when distracted. I painted the center with fingernail polish. If desired, I could drill a hole in the end and put a eye bolt in so I can hang it from the wall when not in use.


This won't snag on yarns. I'll keep you updated on how it works.

Wednesday, December 8, 2010

Newest Projects - Blanket Undulating Twill (Denise)


Some of you may remember my spun Columbia. I’ve dyed it navy blue for the warp and mauve for the weft. I’ve learned to gently set the weft in place to get the pattern to properly show itself. When done, I’ll cut and sew the two halves together for a nice blanket. I'll decide how to finish and enclose the ends when the time comes.

In all honesty, I made a gaff when dyeing. I forgot to loosen all the ties on the woodrose. I also didn’t move it around in the pot as much as I should have. Readjusting the yarn in the pot makes sure the dyes are spread out for even distribution. Now I have slightly space-dyed woodrose. I didn’t bother redyeing because it would look worse. I remembered my mistakes for the navy and everything turned out just fine. As it is, it has grown on me - 5+ yards of cloth will do that.


The dyes are Cushings this time. The dyes are consistent and fesh. The mistakes are mine. Here's the color card.